How To Install Composite Slate Roofing
THINGS TO KEEP IN MIND BEFORE INSTALLING COMPOSITE ROOFING TILES
Before you begin installing your composite roofing system, there are a few prerequisites required and things to bear in mind.
- For your roof decking material, you should have a minimum of 12mm WPB plywood board, solid wood decking or oriented strand board (OSB).
- With a ventilation system split between the ridge and soffit, 0.09m2 of net free area is required for every 27.9m2 of attic floors space. It is required to have 0.09m2 of ventilation for every 13.9m2 of attic floor space if this balance cannot be achieved.
- Guardian slate roofing is 100% recyclable; if you wish to recycle your composite roofing at the end of its lifecycle, contact your local recycler to make the necessary arrangements and state that the product is mineral-filled polypropylene plastic.
PREPARATION BEFORE INSTALLING
Tools And Equipment You Will Need
- Cordless drill or screwdriver
- Sharp utility blade or standard circular saw
- 30mm x 4mm head stainless steel screws, an average of two for each tile
- Tape measure
- Pry bar
- Tin snips
- Blue chalk
How Much Spacing Should There Be Between Slates?
Composite roofing tiles should be placed 6mm apart to allow for potential expansion and contraction. To make this an easy process, each tile has 6mm space tabs on each side.
Laying Out The Slates
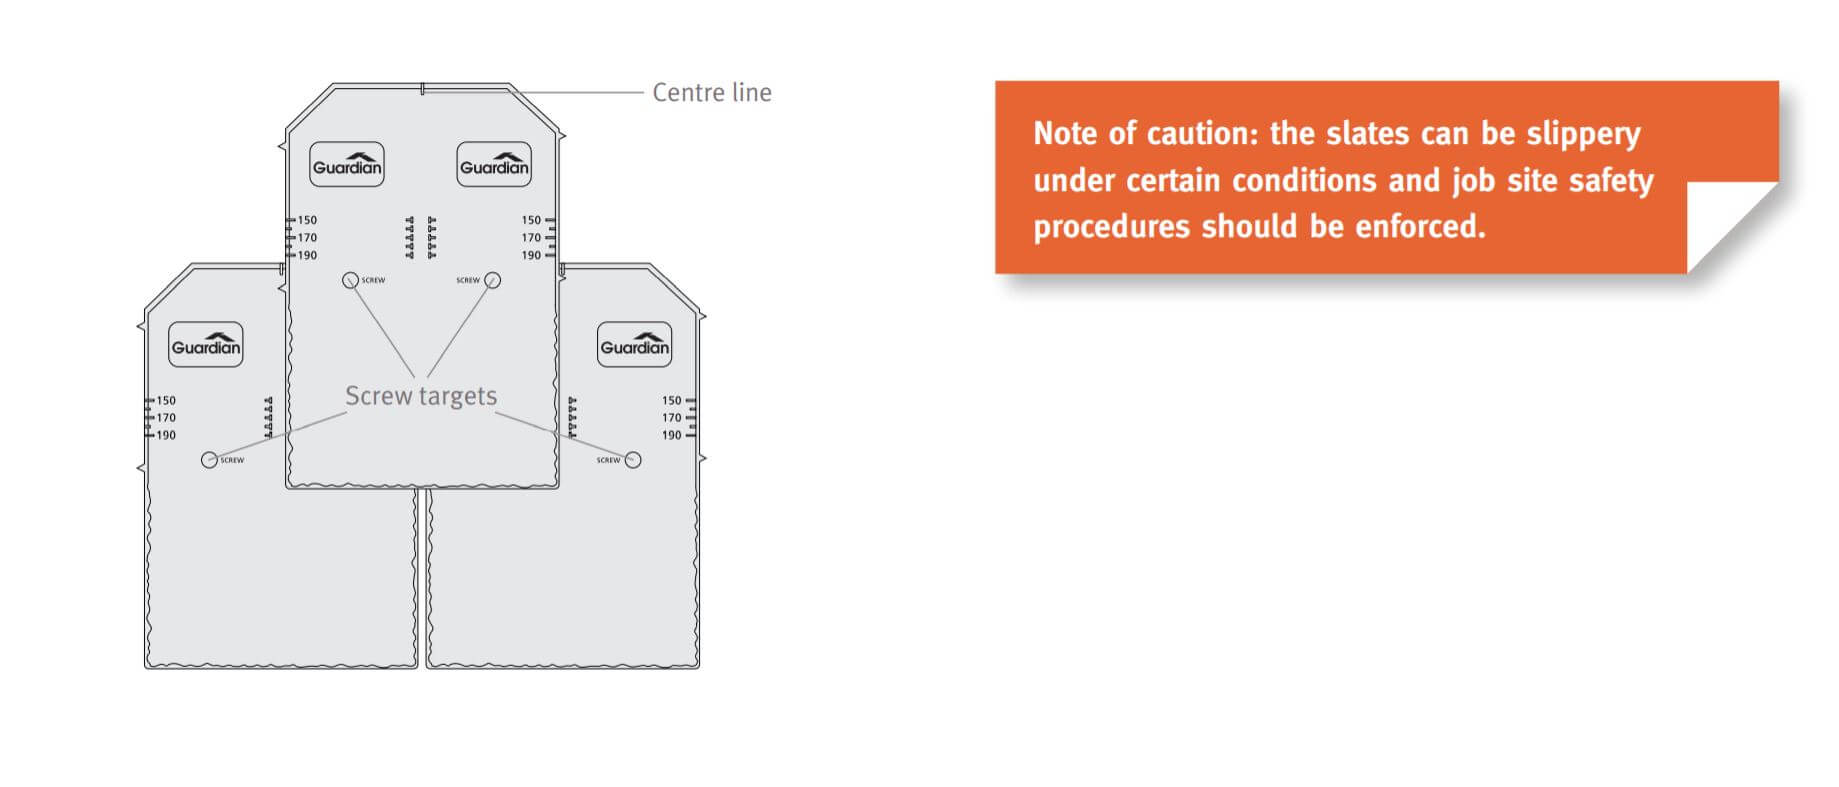
When beginning or finishing with a cut tile, the cut edge should be installed inwards and the manufactured edge should be installed on the outside edge of the roof, this help give the roof a better appearance. If cutting tiles in half, the centre mark can be used for guidance. The centre mark is also helpful as a guide for keeping courses straight and maintaining the 6mm spacing when aligning with occasional vertical chalk lines.
Final Preparations
- Ensure the surface area you are going to install on is uniformly flat, clean, smooth and free of any irregularities.
- Inspect your roof sheathing to confirm that sheathing joints are supported by framing, blocking or metal clips.
- Metal or any other speciality flashings should be installed prior to the composite roofing installation. Any other work that penetrates the roof plane must also be completed.
- Ensure that your roof decking is sloped for drainage and is completely anchored to sound framing. Clear any foreign particles from the interlocking areas to ensure proper seating and to prevent moisture intrusion.
INSTALLING THE ROOF SLATES
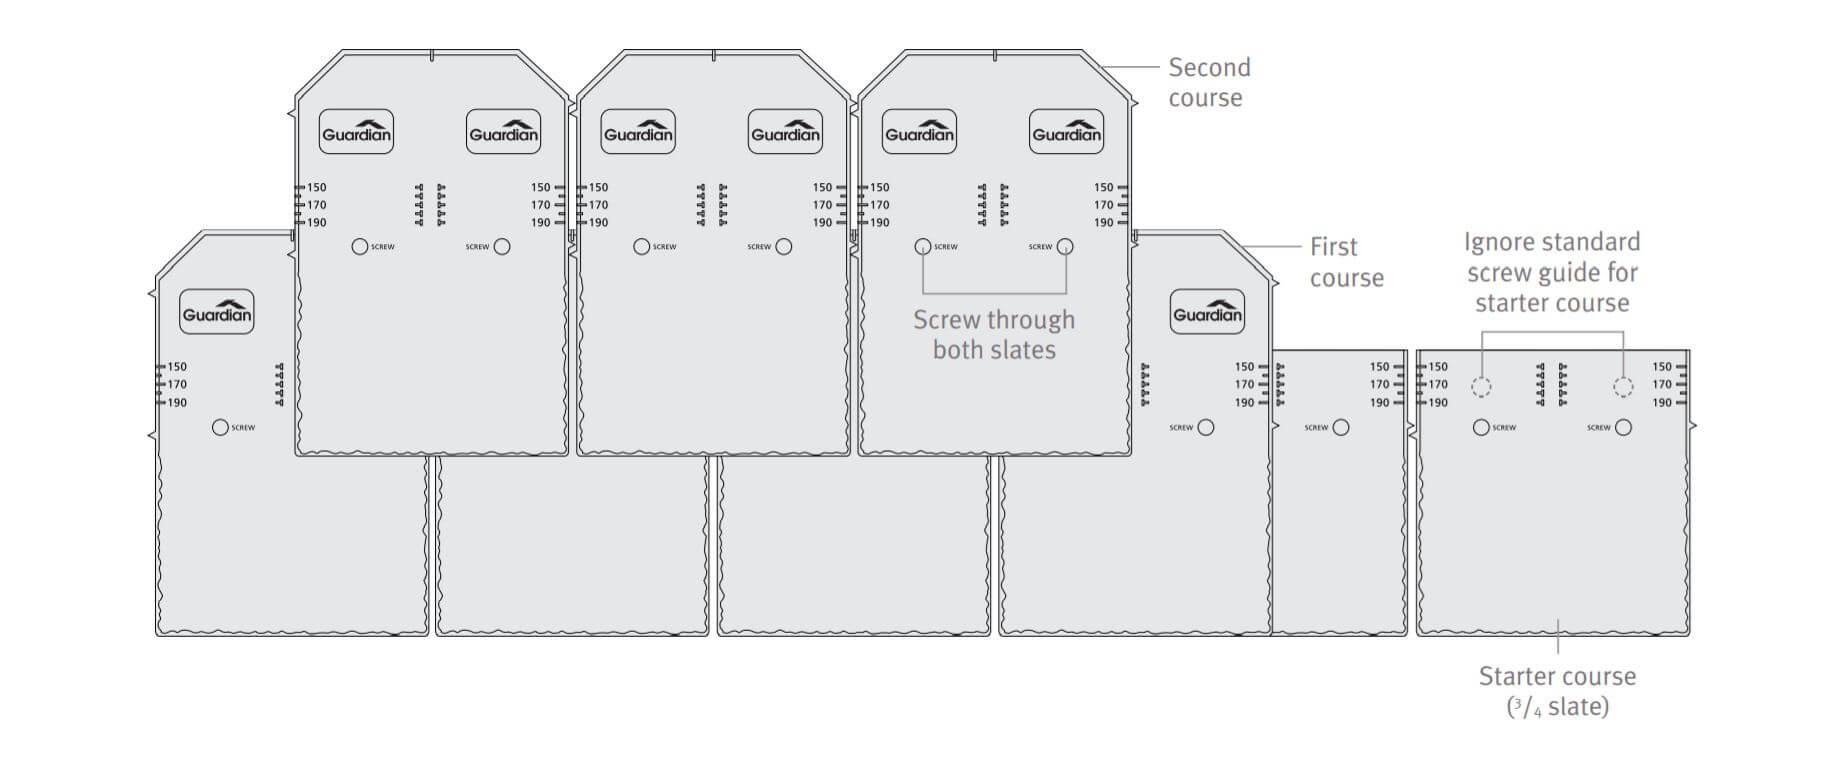
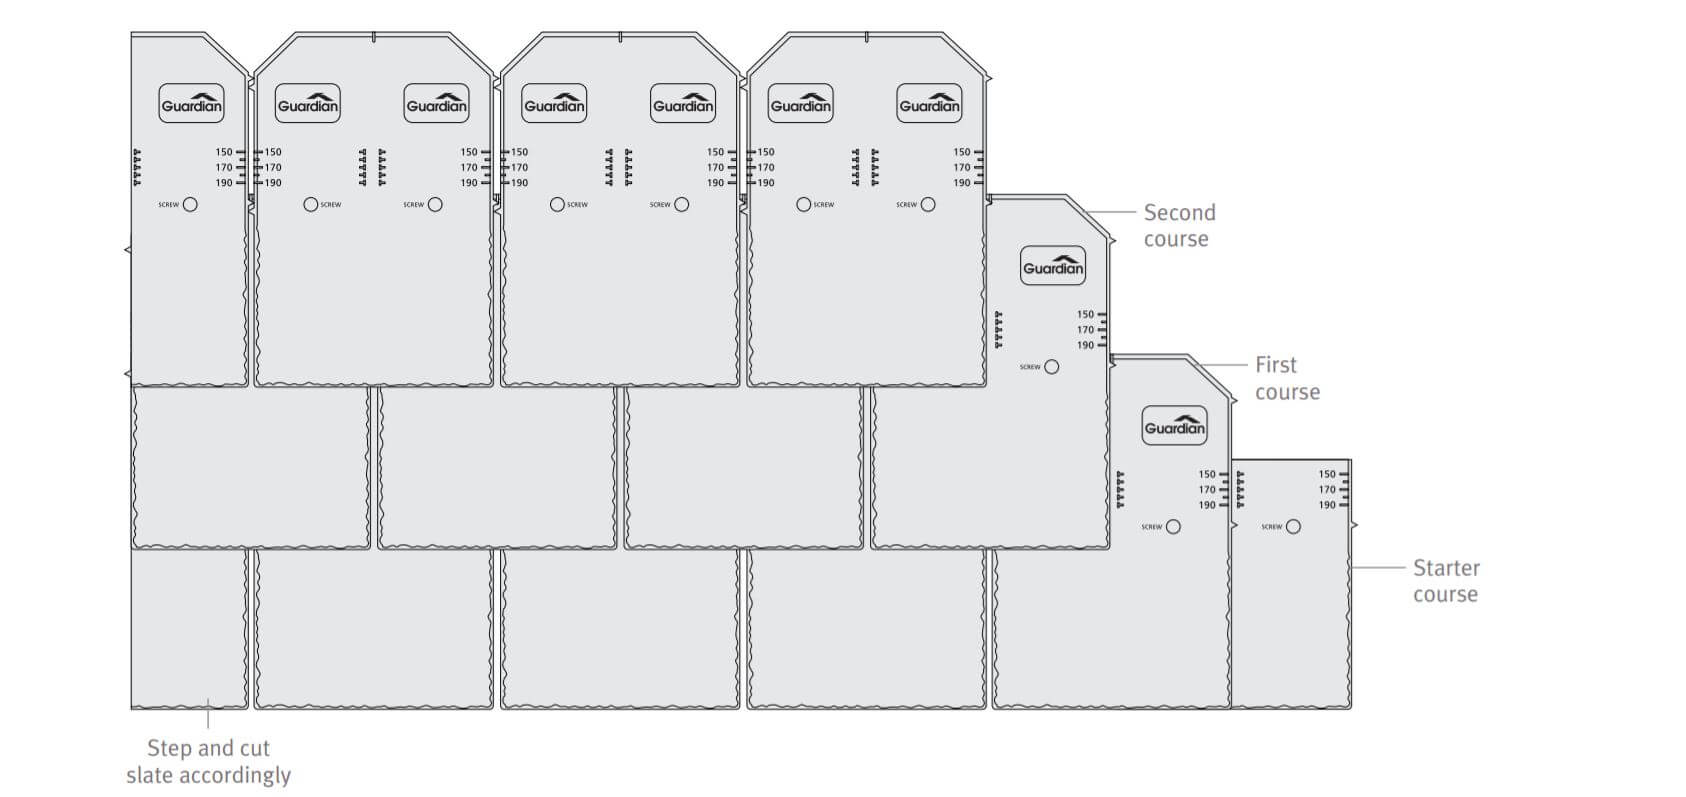
- The starting point of your installation can be from the left side, right side or centre of the planned installation area. To create an eaves or starter slate, cut a full slate to ¾ size.
- Locate the centre of the roof area to be covered. From each end, position the starter slates you’ve cut and draw a horizontal line with blue chalk from the top of the starter slates between the two slates. Now draw a vertical perpendicular line. This line can easily be drawn by marking 0.91m along the eave and where 1.22m and 1.52m intersect, a perpendicular line will be formed. As long as the ratio 3:4:5 stays the same this will hold true, for example, 21:28:35.
- Start placing an eaves slate on the left and right side of the vertical chalk line whilst maintaining the 6mm spacing requirement and continue until both ends overhang the eaves by a maximum of 50mm. Ignore the screw fixing guides on the tiles for the starter course.
- Using a full slate tile, start your first course and align the centre locator line of the slate over your vertical blue chalk line. You should adjust this roof slate up or down in order to align the exposure lines to the top edge of the starter course. Now continue with more tiles to complete the course whilst continuing to maintain the 6mm spacing between slates.
- Using the fixing guides on each slate tile, screw them to the roof with 30mm x 4mm head stainless steel screws. These screws must penetrate the roof boarding by a minimum of 12mm.
- Continue to place and fix subsequent courses with full standard slates with the finishes edge facing the gable edge.
TIPS FOR INSTALLING ON A FELT AND BOARD ROOF
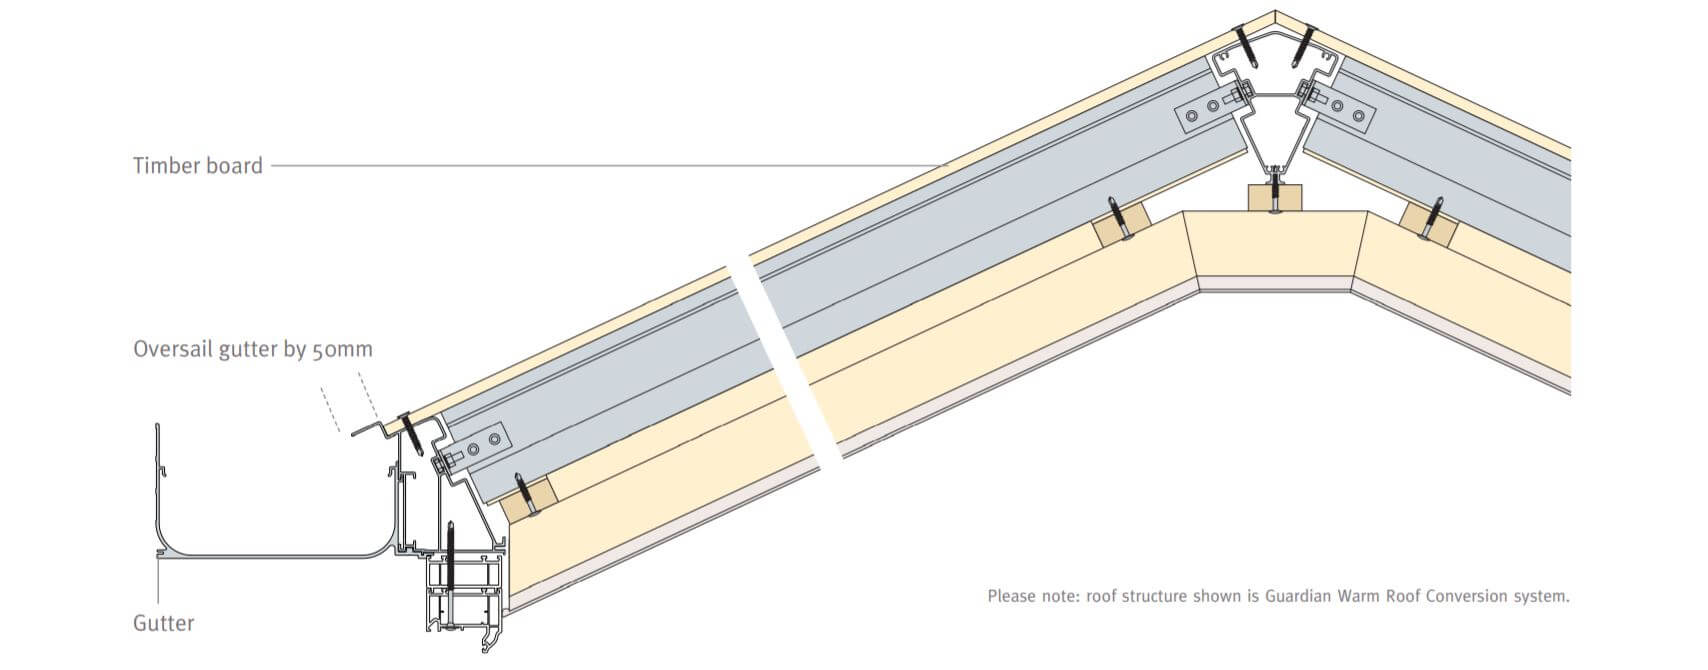
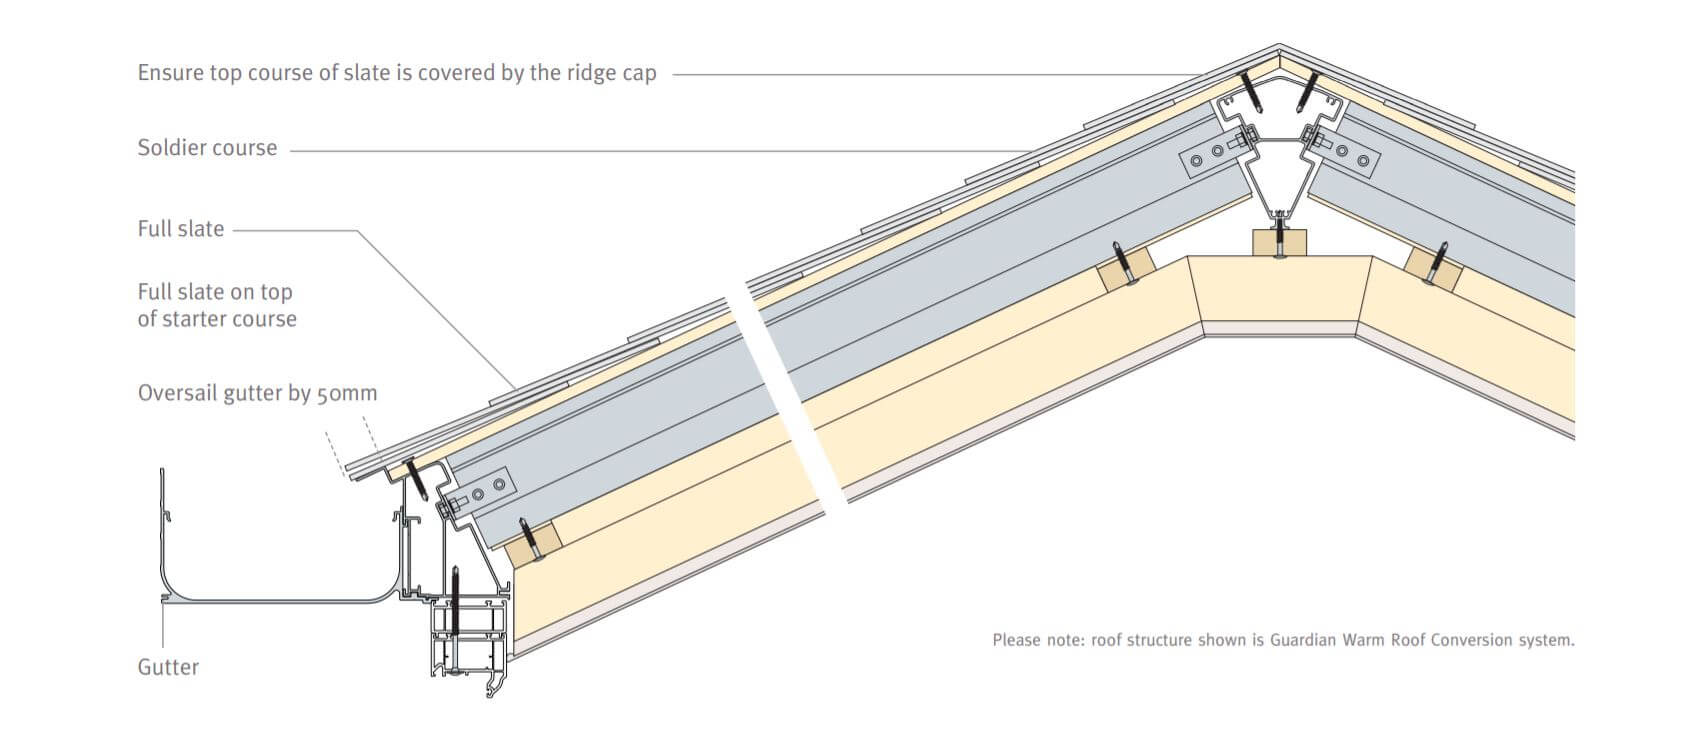
Apart from the lightness and simple use that Guardian slate offers, there is not much different between it and the application of a standard tile roof. For felt and board roofs, start by fixing timber sheets to the rafters of the roof over a vapour permeable underlay. The first and starter course should oversail the fascia by at least 50mm as show in the diagrams below.
Ensure that your first course of tiles and eaves course are laid in a broken bond as illustrated below. It will be necessary to cut to start and finish every other course.
MAKING AND FINISHING RIDGE CAPS
A composite ridge cap finishing can be created from a standard slate tile as shown in the diagram below. You may need to cut a triangle or diamond shape depending on the size of the gap you need to cover. The cap can be sealed with silicon sealant.
INSTALLING THE HIPS & RIDGES
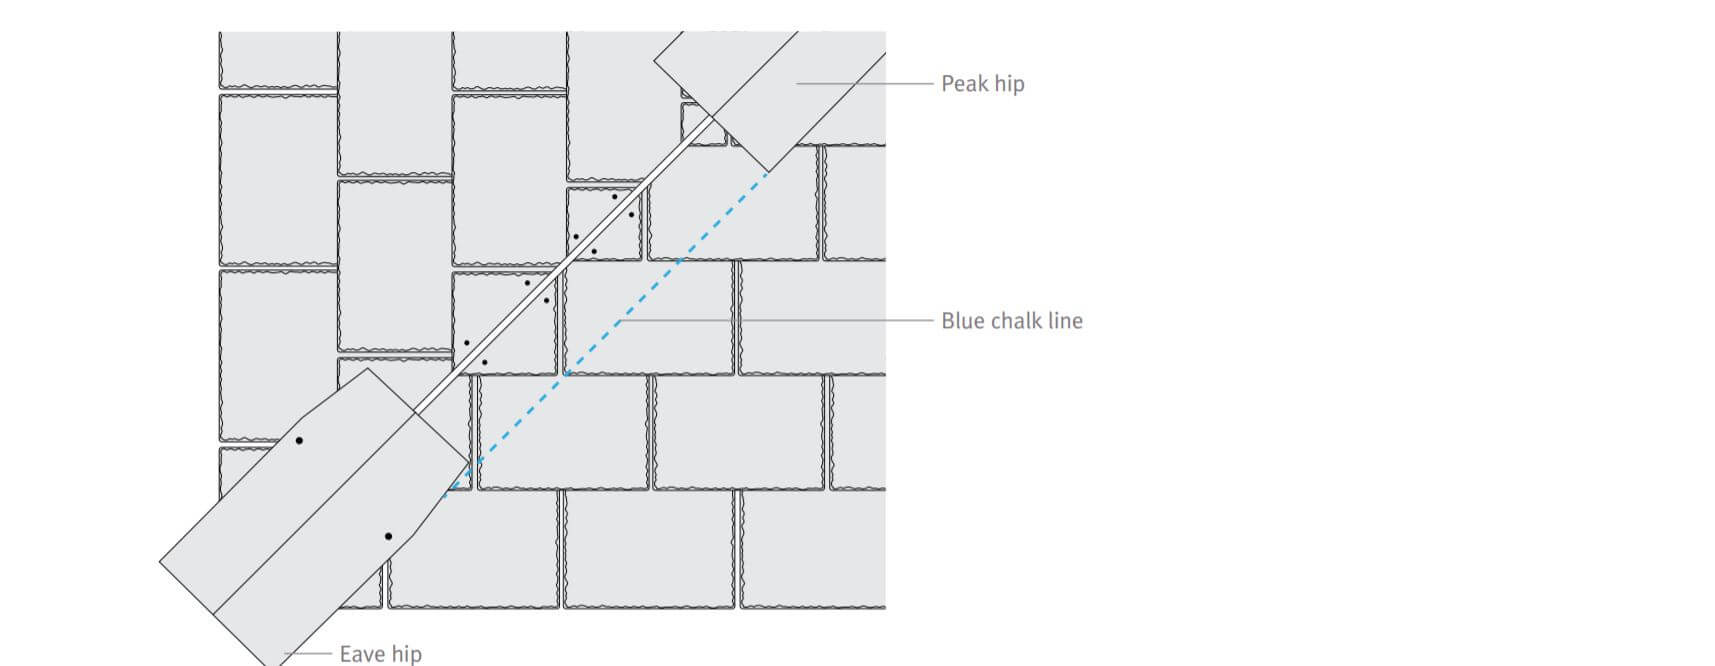
When installing pre-formed hip and ridge slates, fix screws into the pre marked guides. Fix each hip slate with two screws and maintain a 152mm exposure.
- Draw a straight line with blue chalk by placing a piece of hip on top of the eave and another one near the peak. You should now draw a line at the edge of the top and bottoms of the hips as shown in the diagram below.
- If any screw heads are still visible, they can be covered with paint that is compatible with slate roofing or a coloured sealant.
- As mentioned above, pre-formed ridge slates require 152mm for exposure, use 51mm length fasteners for the slate. Fastener deck penetration must be at least 19mm.
THE RIDGE TO HIP INTERSECTION
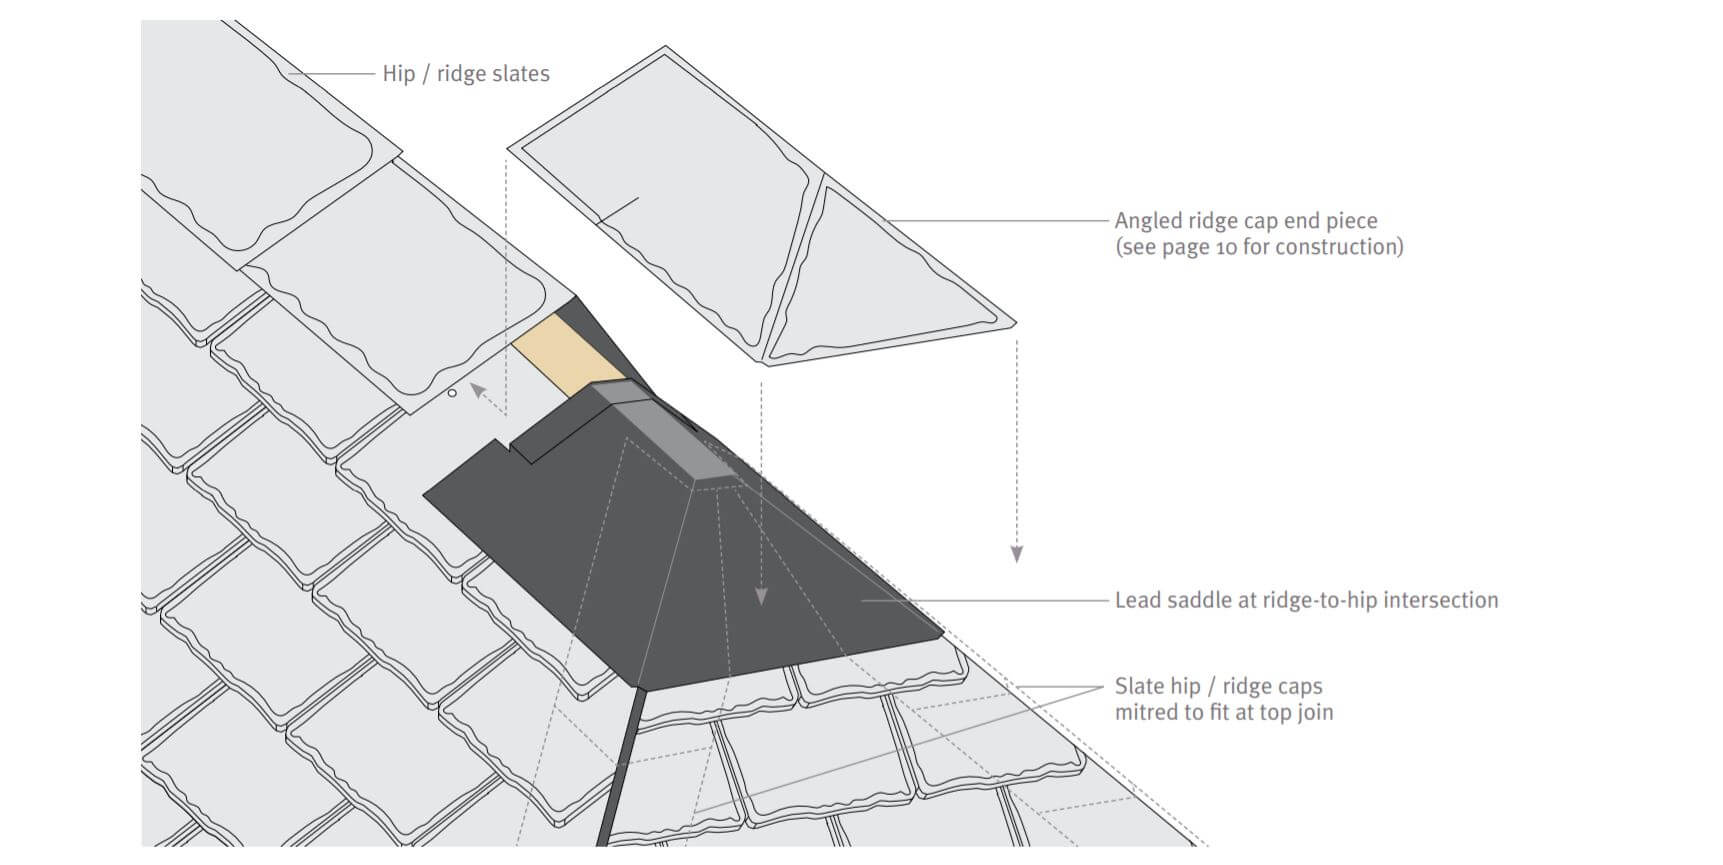
When a ridge tile and a hip tile intersect, this area should be weatherproofed. A lead saddle should be fitted to cover the intersection between the ridge and hip as depicted in the diagram below. The slate tiles will cut easily without cracking or splintering in order to create a neat mitred joint.


